Cloning a repo
Before starting, you’ll need to grab a copy of the repo to which you’d like to contribute.
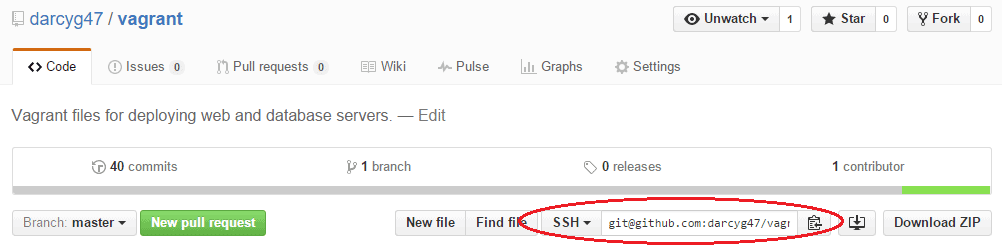
- Point your browser to the repo on GitHub.com
- In the menu bar near the top, make sure SSH is selected and copy the address
- Launch Git Bash
- Navigate to the directory into which you would like to clone the repo
- Note that if you’ll be developing locally using Vagrant, you’ll want to choose a directory below the directory in which the Vagrant box exists
- Execute the following command:
git clone the@repo.address:you.copied
You should now have a local copy of the project within a new directory. For the sake of completeness, the clone command is identical to executing the following sequence of commands:
mkdir repo_name cd repo_name git init git remote add origin the@repo.address:you.copied git fetch --all git pull origin master
Making Your Own Branch
Now that you’ve got a local copy, you can get to work. Depending on your workflow, you’ll want to switch to your active development branch. This could be master, develop, or any other user defined name.
Note: If you’re working on an existing project that was long ago cloned to your machine, you’ll want to make sure that you have the most recent version of the active development branch before executing the following steps. Otherwise, you’ll find yourself in a merging nightmare.
To do so, checkout your local copy of the development branch (in this example we’ll assume it’s called develop), git checkout develop , then pull the updates with git pull origin develop
Navigate to your new repo directory and run the command: git branch -a
You’ll see a listing of all available branches since the last git fetch . If at any time you’d like to update the list based on any changes in the remote repository, run the command git fetch --all .
- Switch to your active development branch, in this case we’ll assume it’s called develop
- Run the command
git checkout develop- Your shell should now indicate that you’re in the develop branch
- Run the command
git checkout -b my_new_feature- Note that this is shorthand for:
git branch my_new_feature git checkout my_new_feature
If you run git branch -a now, you should see your new branch listed as existing on your local machine, but not in remotes/origin. That’s fine for now, we’ll share our work later.
Making Changes
Make changes to the files in your my_new_feature branch with your favourite text editor (probably Vim) as you normally would.
When you’re happy with your changes, and have finished testing, you’ll need to stage them.
- Run the command
git status- You should see a list of the files that you’ve changed or added
- Run the command
git add .
This will stage all new and changed files in the current directory, recursively. You may need to navigate to a parent directory a few levels higher in order to capture all of your changes.
Alternatively, you can add individual files using git add file_name. Note that most bash style wilcards will work here.
- You can run
git statusagain to show that the files have been staged. - To commit the change, run
git commit -m "Here is my commit message"
Your commit message should be as descriptive as possible in order to facilitate roll backs in the future, should they be necessary.
Ideally, your commit command would look like the following:
git commit -m "This is the title of my commit
This is the body of the commit message. It goes into detail explaining the changes that were made."
Rinse and repeat as necessary.
Pushing your Branch to the Remote Repo
When you’re ready to push your commits to the remote repo, simply run the following command:
git push origin my_new_feature
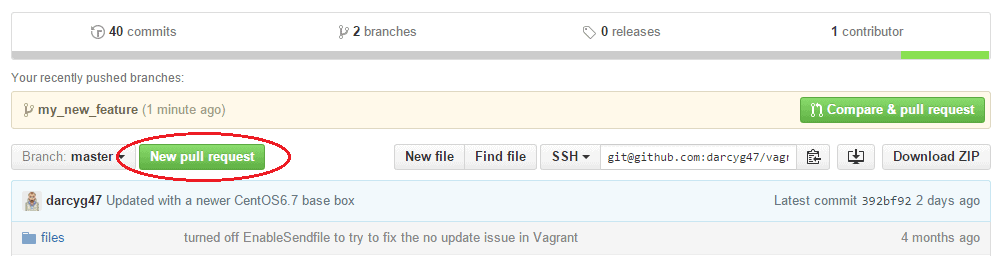
You should now be able to see your my_new_feature branch on the github.com repo page.
Continue the pattern of making commits to your local branch and pushing them to the remote repository until you’re ready to have the changes in your my_new_feature branch introduced into the active development branch.
Creating a Pull Request
You’re happy with your my_new_feature branch and feel it’s ready to be merged into the active development branch. On the repo’s github.com page, click the green New Pull Request button in the top toolbar.
From the base and compare menus, choose the active development branch and your my_new_feature branch, respectively.
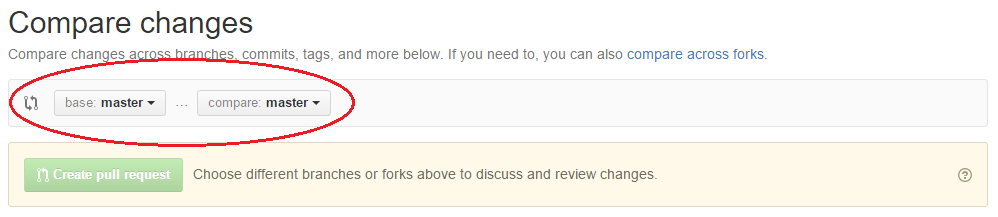
Complete the form and click Create Pull Request. Once the request has been reviewed, it will either have changes proposed or be merged into the active development branch.